不管在哪個平台開發,都會遇到設計師尋求特定字體來增強他們的設計,今天就來介紹要如何在 Flutter 中自定義字型。
下載字型檔
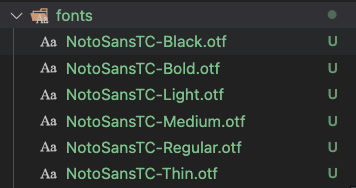
先假設需要的是 Noto Sans Traditional Chinese 這個由 google fonts 提供的字型,下載後可以看到有 6 種粗細的 otf 檔案。
把這些字型檔案移到專案的根目錄底下 fonts 或是 assets,這邊我選擇放在 fonts 目錄下。
![font-files]()
以下是 Flutter 支援的字型檔案
定義字型
這種下載來的檔案,必須要先定義起來,系統才會認識。就好像在網頁,會透過 @font-face 來定義有哪些 font-family 以及檔案來源。
打開 pubspec.yaml 中找到被註解起來的 fonts 段落,把內容改成我們所需要的 NotoSansTC 及每個檔案對應的粗細。
1
2
3
4
5
6
7
8
9
10
11
12
13
14
15
16
| flutter:
fonts:
- family: NotoSansTC
fonts:
- asset: fonts/NotoSansTC-Thin.otf
weight: 100
- asset: fonts/NotoSansTC-Light.otf
weight: 300
- asset: fonts/NotoSansTC-Regular.otf
weight: 400
- asset: fonts/NotoSansTC-Medium.otf
weight: 500
- asset: fonts/NotoSansTC-Bold.otf
weight: 700
- asset: fonts/NotoSansTC-Black.otf
weight: 900
|
變更預設字型
設定好後就可以到 MaterialApp 變更整個 APP 的預設字型。
採用前一篇 [flutter] 在 GoRoute 中使用 NavigationBar 中套用 router 的作法加上 fontFamily。
1
2
3
4
5
6
7
8
9
10
11
| return MaterialApp.router(
title: 'Flutter Demo',
theme: ThemeData(
primarySwatch: Colors.blue,
fontFamily: 'NotoSansTC',
),
routeInformationProvider: router.routeInformationProvider,
routeInformationParser: router.routeInformationParser,
routerDelegate: router.routerDelegate,
);
|
在特定元件中變更字型
若再特定的元件中不想要套用預設的字型,則可以直接指定 fontFamily 即可。
1
2
3
4
| child: Text(
'Noto Sans Traditional Chinese sample',
style: TextStyle(fontFamily: 'NotoSansTC'),
),
|
特殊情境
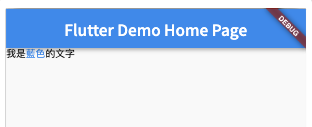
當一段文字中包含連結或是改變顏色,會使用 RichText 搭配 TextSpan,但發現到這樣並不會繼承預設字型。
1
2
3
4
5
6
7
8
9
10
11
12
13
14
15
16
17
| RichText(
text: const TextSpan(
children: <TextSpan>[
TextSpan(text: '我是'),
TextSpan(
text: '藍色',
style: TextStyle(
color: Colors.blue,
),
),
TextSpan(text: '的文字'),
],
style: TextStyle(
color: Colors.black,
),
),
);
|
![RichText-without-custom-font]()
這邊有兩個解法,一個當然就是重新指定字體,另一個則是把 RichText 換成 Text.rich 即可。
參考 https://github.com/flutter/flutter/issues/35992
1
2
3
4
5
6
7
8
9
10
11
12
13
14
15
16
17
| Text.rich(
const TextSpan(
children: <TextSpan>[
TextSpan(text: '我是'),
TextSpan(
text: '藍色',
style: TextStyle(
color: Colors.blue,
),
),
TextSpan(text: '的文字'),
],
style: TextStyle(
color: Colors.black,
),
),
);
|
![Textrich-custom-font]()
參考