這是系列文的第四篇,今天要講的是針對 JSRuntime 及 NavigationManager 做測試。
使用同一個 repo 接續操作
JSRuntime 使用 JSRuntime 到目前為止,都還沒有呼叫到 JS 的部份,接著要將 Counter 的計算放到 JS 中處理。
1 2 3 4 5 6 7 8 9 10 11 12 13 14 15 16 17 18 19 20 21 22 @inject IJSRuntime _jsRuntime; <PageTitle > Counter</PageTitle > <h1 > Counter</h1 > <p role ="status" > Current count: @CurrentCount</p > <button class ="btn btn-primary" @onclick ="IncrementCount" > Click me</button > @code { [Parameter] public int CurrentCount { get; set; } private async Task IncrementCount() { // 將計算放到 JS 中,並取得回傳值 CurrentCount = await _jsRuntime.InvokeAsync<int > ("incrementCount", CurrentCount); } }
建立新資料夾 js 放在 wwwroot 底下,並產生 counter.js 的檔案,準備用來寫被呼叫的函式。
1 2 3 4 function incrementCount (count ){ return count+1 ; }
最後就是在 index.html 中引用 counter.js 即可。
1
2
3
4
5
6
7
<!DOCTYPE html > <html lang ="en" > <head > <script src ="js/counter.js" > </script > </head > </html >
都寫完以後試著執行看看,確認行為是正確的就沒問題。
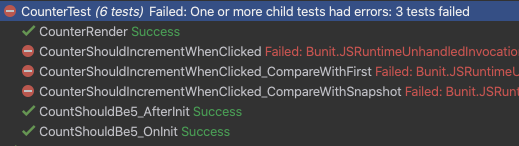
改寫測試案例 修改後執行沒問題,試著重新測試 CounterTest.cs 的所有案例,可以看到有三個測試案例失敗。
在 bUnit 中有提供 JSInterop 來做為測試的 JSRuntime 實體,像是前面幾篇用的 mock 手法,將取代原本的函式行為。
1 2 3 4 5 6 7 8 9 10 11 12 [Test ] public void CounterShouldIncrementWhenClicked (){ using var ctx = new Bunit.TestContext(); ctx.JSInterop.Setup<int >("incrementCount" , 0 ).SetResult(1 ); var comp = ctx.RenderComponent<Counter>(); comp.Find("button" ).Click(); StringAssert.Contains("Current count: 1" , comp.Markup); }
也可以用另一種方法,不要馬上指定結果,而是被呼叫前再指定。
1 2 3 4 5 6 7 8 9 10 11 12 13 14 15 16 17 18 19 20 21 22 23 24 [Test ] public void CounterShouldIncrementWhenClicked_CompareWithSnapshot (){ using var ctx = new Bunit.TestContext(); var jsruntime = ctx.JSInterop.Setup<int >("incrementCount" , 0 ); var comp = ctx.RenderComponent<Counter>(); var button = comp.Find("button" ); jsruntime.SetResult(1 ); button.Click(); comp.SaveSnapshot(); jsruntime = ctx.JSInterop.Setup<int >("incrementCount" , 1 ); jsruntime.SetResult(2 ); button.Click(); var diffs = comp.GetChangesSinceSnapshot(); var diff = diffs.ShouldHaveSingleChange(); diff.ShouldBeTextChange("Current count: 2" ); }
Navigation 執行登入後,驗證成功後會需要導到主頁,或者是說在選單點擊了某個連結要跳轉過去,在元件的測試中,也會希望確定這樣的行為能夠被驗證。
在 blazor 中,頁面的切換是透過 NavigationManager 來操作,在 bUnit 的測試框架中,提供了 FakeNavigationManger 這個物件,來取得相關的資料。
使用 NavigationManager 做導頁 在範例中,有一個元件 NavMenu.razor 提供三個頁面的連結可以點擊,將其中一個改成由 NavigationManager 來做導頁的行為。
1
2
3
4
5
6
7
8
9
10
11
12
13
14
@inject NavigationManager _navMan <div class ="nav-item px-3" > <NavLink class ="nav-link counter" @onclick ="GoCounter" > <span class ="oi oi-plus" aria-hidden ="true" > </span > Counter </NavLink > </div > @code { private void GoCounter() { _navMan.NavigateTo("counter"); } }
撰寫測試 先寫最基本的測試案例,確保元件的內容如我們預期。
1 2 3 4 5 6 7 8 [Test ] public void RenderComponent (){ using var ctx = new Bunit.TestContext(); var comp = ctx.RenderComponent<NavMenu>(); StringAssert.Contains(@"class=""nav-link counter""" , comp.Markup); }
接著就是來寫當按下 Counter 的連結,會透過 NavigationManager 來進行導頁的動作。
1 2 3 4 5 6 7 8 9 10 [Test ] public void Navigate2CounterPage (){ using var ctx = new Bunit.TestContext(); var navMan = ctx.Services.GetRequiredService<FakeNavigationManager>(); var comp = ctx.RenderComponent<NavMenu>(); var menu = comp.Find(@"a.counter" ); menu.Click(); StringAssert.Contains("/counter" , navMan.Uri); }
Reference